stentFIT


Semi-automated virtual stent implantation with mixed-dimensional modelling
Full documentation, including the API reference and workflow diagrams, is hosted at stentfit.readthedocs.io.
stentFIT turns a stent surface mesh (.stl) into a 1D beam-element model that is ready for beam-to-solid contact simulation. It samples the stent surface, detects its rings, extracts a 2D skeleton from each ring, wraps that skeleton back onto the 3D mid-surface, fits a B-spline to each strut curve, and meshes the result into Simo–Reissner beams with BeamMe.
Extracting the 1D wireframe is semi-automated, so you can check the intermediate steps and edit them by hand if you need to. Ring detection and 2D skeletonisation are the two steps where this matters most. There is also a smoke test that checks the quality of the 1D stent model inside a generated pipe-like 3D vessel.
Installation
You need Python 3.13, which is pinned to match BeamMe’s supported range, and Git on your PATH. BeamMe calls git to write commit metadata into the generated 4C input files, so it fails at runtime without it. Both steps below install Git with conda.
Option A: just use the package
The steps are the same on macOS, Linux, and Windows (PowerShell). On Windows, use python and pip, not the py launcher:
conda create -n stentfit-env python=3.13
conda activate stentfit-env
conda install -c conda-forge git
pip install stentfit
pip installs the core dependencies for you, such as beamme (stent beam meshing and artery solid meshing), gmsh (artery solid meshing) and fourcipp. To actually run the generated simulation input files you also need a compiled 4C executable, which is not included in this package.
Option B: clone the repo and start developing
git clone https://github.com/VuralAktas/stentFIT.git
cd stentFIT
conda env create -f environment.yml   # Python 3.13 + pip + git
conda activate env_stentfit
poetry install                        # installs stentfit + all dependency groups
This way git comes in automatically through environment.yml. You also get the example notebooks and the locked dependency versions (poetry.lock) that match the rest of the project.
What it does & How to use it
from stentfit import Stent, Artery, Simulation

# 1. STL -> 1D spline wireframe
stent = Stent(stl_file="stent01.stl", stent_name="stent01", output_dir="outputs/stent01")
stent.skeletonize()

# 2. A test artery sized to that stent
artery = Artery(stent, artery_type="curved")

# 3. Warp, tie, check, and write the 4C input
sim = Simulation(stent, artery, sim_input_dir="outputs/simulation")
sim.setup()
Just note that this example is a simplified version of the full workflow. Each call runs a fixed sequence of steps, and you can also call every step on its own. See Workflows for the breakdown.
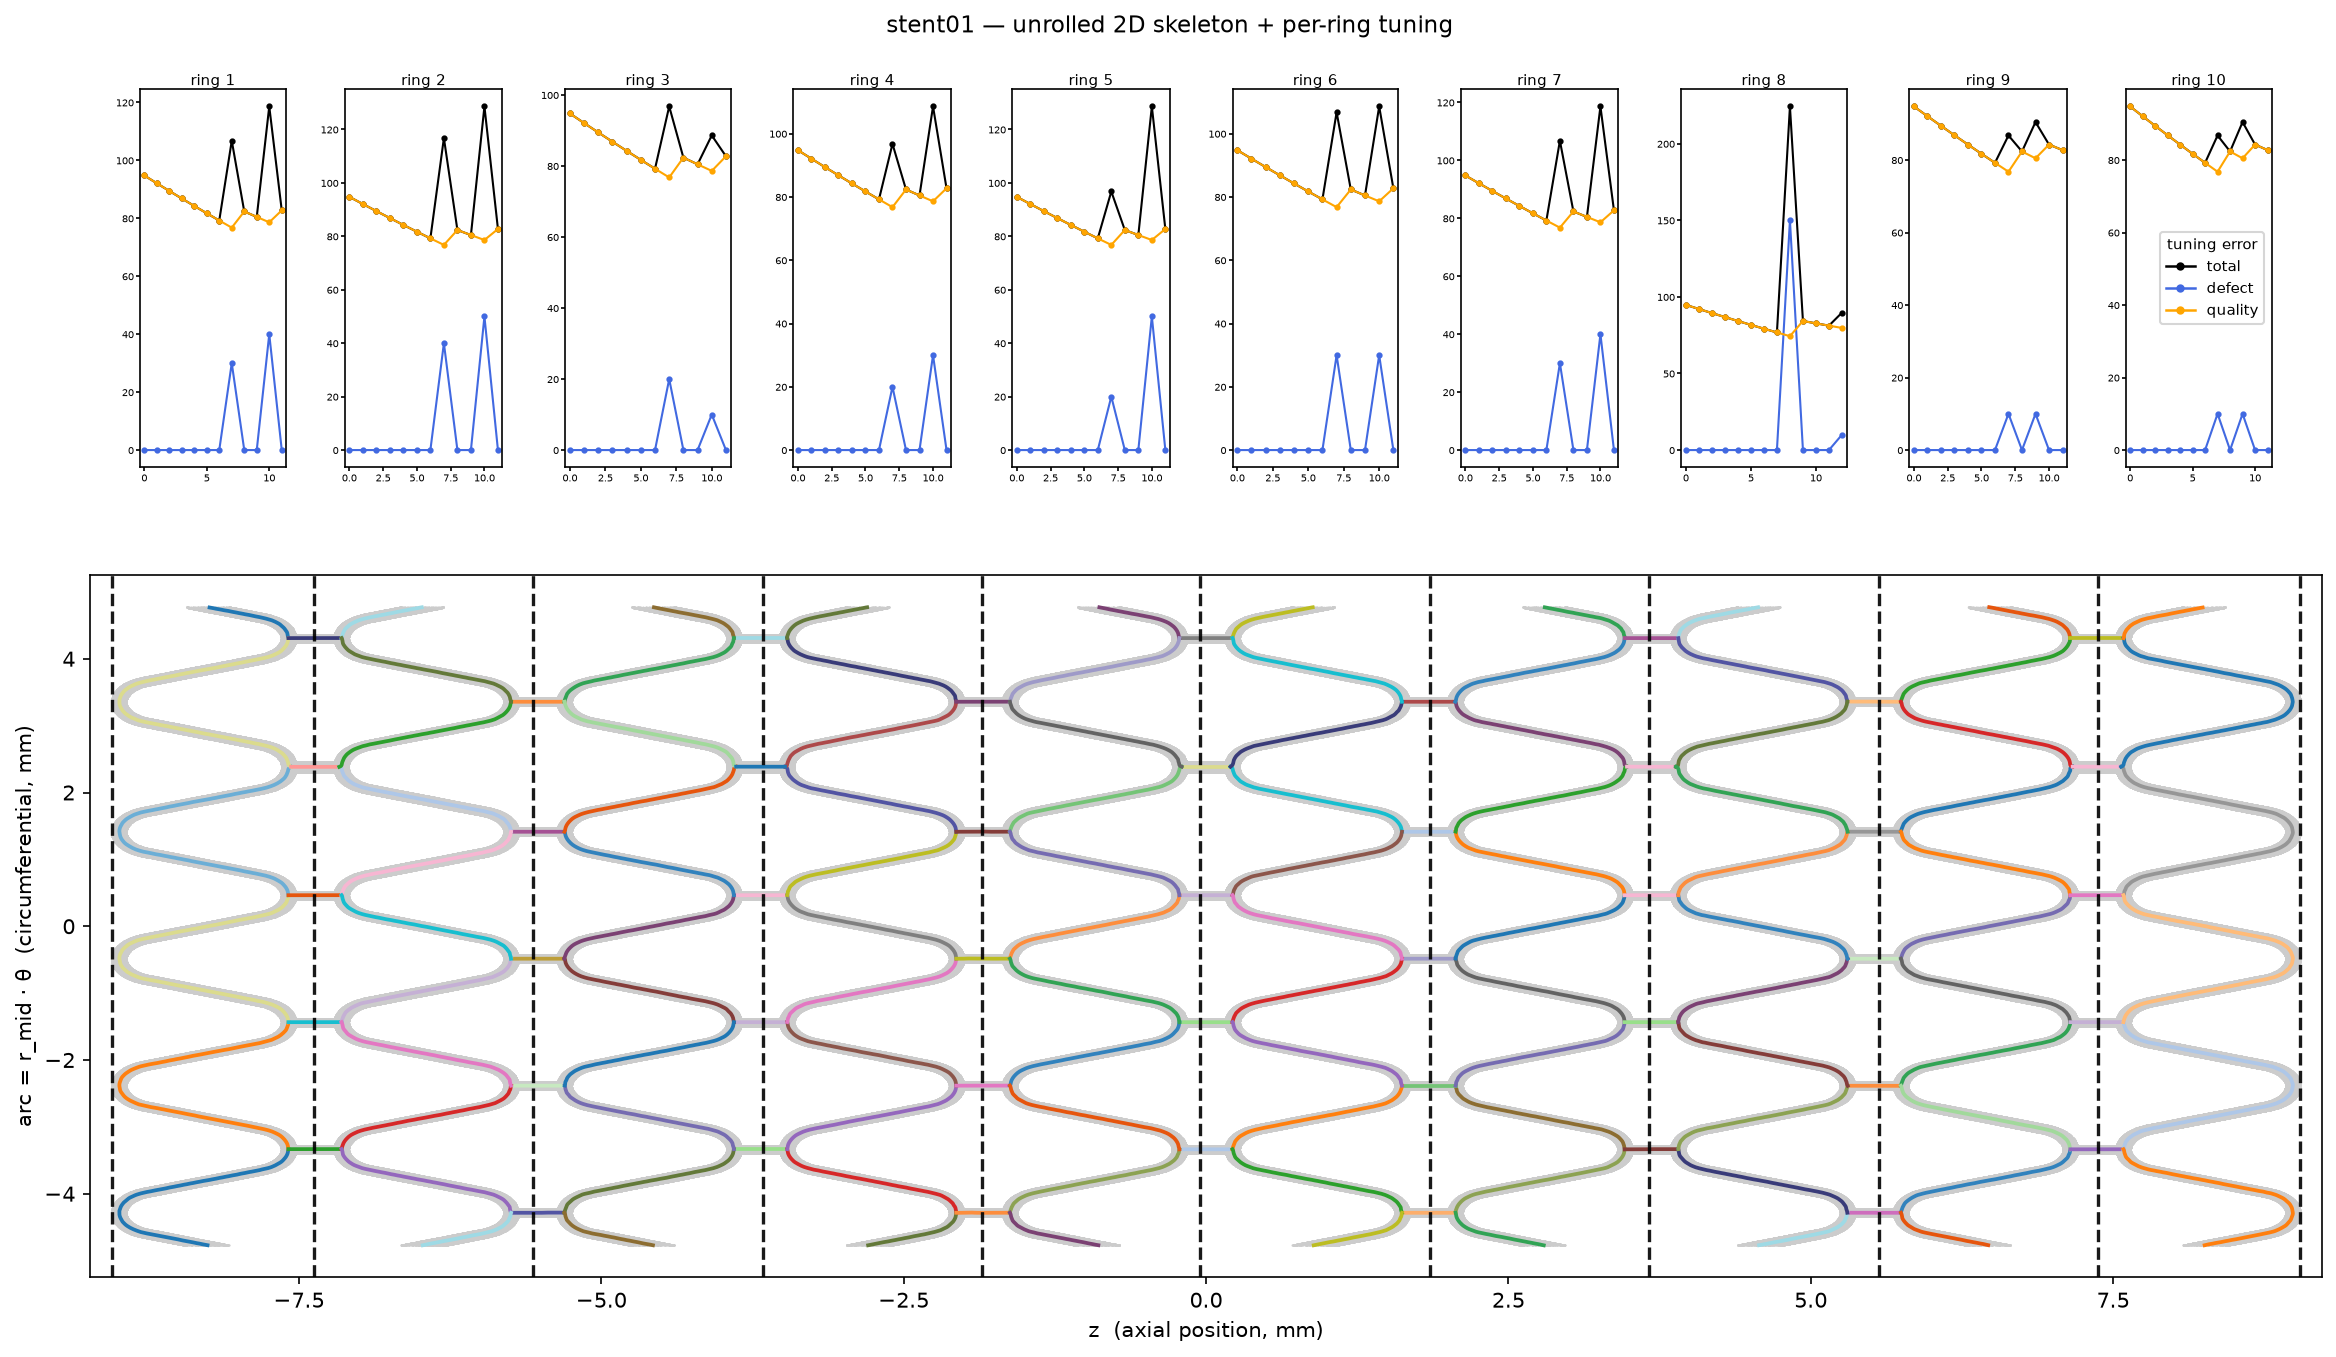
1. Stent skeletonisation (examples/stent_skeleton.ipynb)
Sample a point cloud from the stent STL and align it to its centreline axis.
Detect rings and skeletonise each ring in 2D (optional auto-tuning + manual edits).
Wrap the 2D skeleton onto the local mid-surface, clean up the graph, and fit a B-spline per strut.
Mesh the fitted splines into a 1D Simo–Reissner beam mesh with BeamMe.
Every stage writes its own files into the output directory, so you can check the sampled cloud, the detected rings and each ring’s 2D skeleton as you go. The final results are skeleton_points.csv, skeleton_splines.json and stent_features.json, together with interactive HTML views.
2. Test artery generation & simulation setup (examples/test_sim_generation.ipynb)
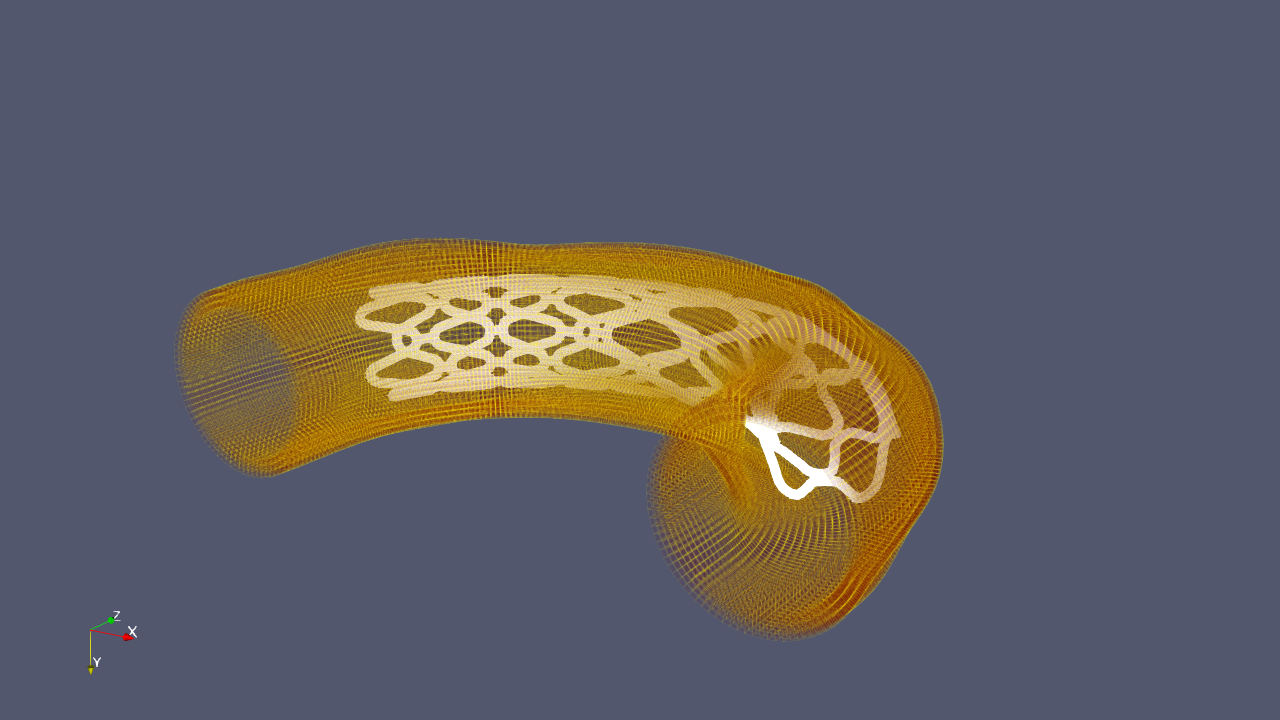
A synthetic/parametric smoke test exercises the full mixed-dimensional chain end-to-end:
Generate a parametric test artery (straight / curved / S-bend) sized to the stent, and mesh its wall as a 3D solid with GMSH.
Warp the stent beam mesh onto the artery centreline.
Check beam-to-solid coupling compatibility (stiffness ratio, element-size ratios) and visualize the stent inside the artery via Paraview.
Tie the beam mesh to the artery lumen and write a schema-validated 4C simulation input file with a quasi-static radial expansion load.
This confirms that the stent-to-artery mapping and the 4C input generation work end to end. It uses placeholder materials and tied meshtying instead of real contact. The full deployment physics, meaning contact, an HGO-C artery material and elasto-plastic beam bending, is planned but not implemented yet.
License
stentfit was created by Vural Aktas. It is licensed under the terms of the GNU General Public License v3.0 or later (GPL-3.0-or-later). See LICENSE for the full text.
Releases up to and including v0.1.2 were published under the MIT license and remain available under those terms.
Citation
Author: Vural Aktas, RWTH Aachen University — ORCID 0009-0000-3181-7695
If stentFIT contributes to work you publish, please cite it. GitHub’s Cite this repository button (repo sidebar) generates APA and BibTeX entries from CITATION.cff, or use:
@software{aktas_stentfit,
  author  = {Aktas, Vural},
  title   = {{stentFIT}: Semi-Automated Virtual Stent Implantation with
             Mixed-Dimensional Modelling},
  year    = {2026},
  version = {0.1.3},
  url     = {https://github.com/VuralAktas/stentFIT}
}
Contributing
Interested in contributing? Reach out at vural.aktas@rwth-aachen.de.
Credits
The beam meshing and the 4C input files are built with BeamMe, a beam finite element input generator by the BeamMe authors. The artery wall is meshed with GMSH, and the generated input files are meant to be solved with 4C.
stentfit was created with cookiecutter
and the py-pkgs-cookiecutter template.